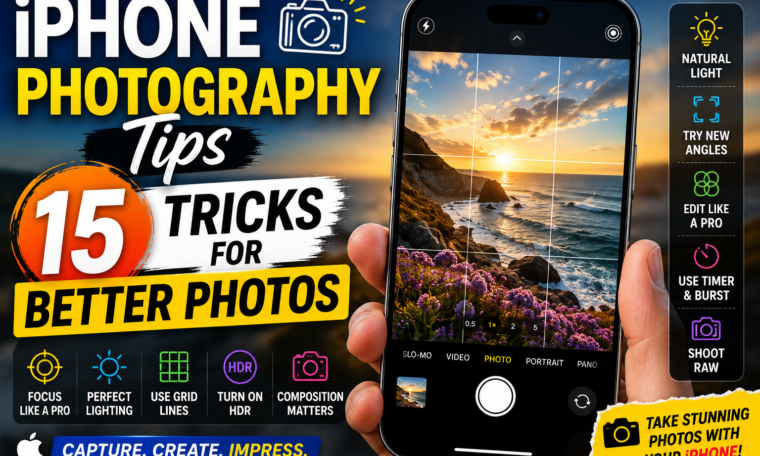
iPhone Photography Tips: 15 Tricks for Better Photos
Your iPhone camera can do far more than simply point, shoot and save a picture.
With the right techniques, you can capture sharper portraits, better sunsets, cleaner food photos and more professional-looking travel shots without buying an expensive camera. Even small changes to composition, lighting and camera settings can make a noticeable difference.
The latest iPhones combine advanced camera hardware with computational photography, giving users powerful tools for everyday photography. However, having a great camera doesn’t automatically make every photo great.
So, how can you take better photos with your iPhone?
From cleaning your lens to using grid lines, controlling exposure and experimenting with different perspectives, these 15 iPhone photography tips can help you get more from your camera in 2026.
1. Clean Your iPhone Camera Lens
Let’s start with the simplest trick.
Before taking an important photo, clean your camera lens.
Your phone spends most of its day in your pocket, bag or hand. As a result, fingerprints, dust and tiny particles can accumulate on the camera glass.
A dirty lens can make photos look:
- Hazy
- Soft
- Less detailed
- Low in contrast
- Overly bright around lights
Use a soft, clean microfiber cloth to gently wipe the lens.
It takes only a few seconds, yet it can make a surprisingly noticeable difference.
2. Turn On the Camera Grid
Composition is one of the biggest differences between an ordinary photo and a compelling one.
Your iPhone’s Grid feature can help you frame subjects more effectively.
Go to:
Settings → Camera → Grid
The screen will display horizontal and vertical lines that divide the frame.
You can use them to apply the rule of thirds, placing your subject along the lines or at their intersections.
For landscapes, the grid can also help keep the horizon straight.
3. Tap to Focus on Your Subject
Don’t always rely on automatic focus.
When photographing a person, pet, flower or object, tap the subject on your iPhone screen.
The camera will focus on the selected area.
This becomes especially useful when the scene contains several objects at different distances.
For example, if you’re photographing a flower in front of a busy background, tapping the flower helps tell the camera what matters most.
4. Adjust Exposure Manually
Here’s a feature many casual iPhone photographers overlook.
After tapping your subject to focus, you can adjust exposure by moving the sun icon that appears beside the focus area.
Move it upward to brighten the image.
Move it downward to darken it.
This is particularly useful in difficult lighting.
For example, if a bright sky causes your subject to look too dark, adjusting exposure can help you find a better balance.
5. Use Natural Light Whenever Possible
Great photography starts with great lighting.
You don’t always need expensive lighting equipment.
Natural light can be your best friend.
When photographing people indoors, try positioning them near a window.
Soft window light can create attractive skin tones and gentle shadows.
For outdoor photography, early morning and late afternoon often provide softer, more flattering light than harsh midday sunlight.
However, don’t be afraid to experiment with shadows.
Sometimes dramatic lighting creates a much more interesting photograph.
6. Avoid Using Digital Zoom Too Much
Zoom can be useful, but excessive digital zoom can reduce image quality.
Instead of immediately pinching the screen to zoom, consider moving closer to your subject when it’s safe and practical.
If your iPhone has a dedicated telephoto camera, use it when appropriate.
Different iPhone models offer different optical and computational zoom capabilities, so the exact results vary.
The general rule is simple:
Use the camera’s optical capabilities when possible and avoid unnecessary digital enlargement.
7. Try Different Camera Lenses
Modern iPhones can offer multiple focal lengths, depending on the model.
You may have options such as:
- Ultra-wide
- Main wide camera
- Telephoto
Each perspective tells a different visual story.
The ultra-wide camera is excellent for landscapes, architecture and large groups.
The main camera is often the most versatile choice for everyday photography.
Telephoto is useful for portraits, distant subjects and situations where you want a tighter composition.
Instead of using the same lens for every photo, ask yourself:
What perspective best tells this story?
8. Use Portrait Mode Carefully
Portrait Mode can create a beautiful background blur.
However, don’t assume that more blur always means a better photograph.
Pay attention to the edges of your subject.
Hair, glasses and complex shapes can sometimes challenge computational background separation.
For a more natural portrait, choose a clean background and leave some distance between the subject and the background.
Good lighting also helps.
9. Use the Rule of Thirds
The rule of thirds is one of the easiest photography techniques to learn.
Imagine dividing your image into nine equal sections.
Instead of placing your subject directly in the centre every time, position it along one of the grid lines or near an intersection.
This can make the composition feel more balanced.
Of course, rules are meant to be experimented with.
A centred subject can work beautifully when you’re deliberately creating symmetry.
10. Experiment With Different Angles
Here’s a simple way to make your photos more interesting:
Stop taking every photo from eye level.
Try shooting from:
- Low angles
- High angles
- Side angles
- Ground level
- Behind the subject
- Close-up perspectives
For example, photographing a building from a low angle can make it appear more dramatic.
Similarly, getting down to your pet’s eye level can produce a much more engaging portrait.
Changing your position costs nothing but can completely transform the image.
11. Look for Leading Lines
Leading lines naturally guide the viewer’s eyes through a photograph.
They can include:
- Roads
- Bridges
- Staircases
- Railings
- Walls
- Shadows
- Buildings
- Paths
When composing your image, look for lines that point toward your main subject.
This technique can make a simple travel photograph feel much more intentional.
12. Use Burst or Motion Capture for Moving Subjects
Photographing children, pets or sports can be challenging.
Just as you press the shutter, your subject may move.
Depending on your iPhone model and camera controls, burst-style shooting can help you capture multiple frames around a moment.
This increases your chances of getting one sharp image with the right expression or movement.
It’s particularly useful for:
- Sports
- Pets
- Children
- Dancing
- Action shots
- Moving vehicles
Afterward, review the images and keep the strongest frame.
13. Don’t Ignore Night Mode
Low-light photography has improved significantly on modern smartphones.
When the iPhone detects a dark scene, Night mode may activate automatically on supported models.
Instead of immediately using flash, try keeping the phone steady and allowing the camera to capture the scene.
A tripod or stable surface can help when you want maximum sharpness.
Also, don’t expect every night photograph to look bright like daytime.
Sometimes preserving darkness creates a more realistic and atmospheric image.
14. Edit Your Photos, But Don’t Overdo It
Editing can transform a good photo into a great one.
However, aggressive editing can quickly make an image look unnatural.
The built-in Photos app provides tools for adjusting things such as:
- Exposure
- Brilliance
- Highlights
- Shadows
- Contrast
- Brightness
- Saturation
- Warmth
- Sharpness
Start with small adjustments.
For example, reducing highlights can help recover detail in a bright sky, while lifting shadows can reveal details in darker areas.
The goal should be enhancement rather than completely changing the photograph.
15. Think About the Story Before You Shoot
This might be the most important iPhone photography tip of all.
Don’t simply ask:
“What should I photograph?”
Ask:
“What do I want the viewer to notice?”
Maybe you’re photographing a busy Indian street.
Instead of capturing everything randomly, choose one person, vehicle, colour or architectural detail as your main subject.
Perhaps you’re photographing food.
Focus on texture, colour and presentation rather than simply photographing the entire plate from above.
Photography becomes much more powerful when you intentionally guide the viewer’s attention.
Bonus iPhone Photography Tips for Instagram
If you’re taking photos specifically for Instagram, consider the final format before shooting.
Vertical compositions can work particularly well for Stories and Reels.
For feed posts, think about how the image will look when cropped.
You should also avoid placing important details too close to the edges.
Additionally, consistent lighting and editing can help create a recognisable visual style across your profile.
Instead of copying every trending filter, develop an editing style that feels natural to you.
Best iPhone Camera Settings to Check
Before going out to take photos, spend a few minutes checking your camera settings.
Depending on your iPhone model and iOS version, useful options may include:
- Grid
- Level
- Lens Correction
- Macro Control
- Preserve Settings
- Photographic Styles
- Live Photos
- Scene Detection
- Prioritise Faster Shooting
Not every option is available on every iPhone.
Therefore, explore Settings → Camera and see which controls your particular model offers.
Common iPhone Photography Mistakes to Avoid
Even with a powerful camera, certain mistakes can ruin a photograph.
Dirty Lens
Fingerprints can create haze and reduce clarity.
Poor Lighting
A great subject can still look flat in bad light.
Excessive Zoom
Digital enlargement can reduce detail.
Crooked Horizons
Use the grid and level to improve alignment.
Overediting
Too much saturation or sharpening can make photos look artificial.
No Clear Subject
If everything competes for attention, the viewer may not know where to look.
Avoiding these mistakes can improve your images immediately.
How to Take Professional-Looking iPhone Photos
You don’t need to make every photograph complicated.
Instead, focus on five fundamentals:
Light: Find interesting and flattering light.
Composition: Place your subject deliberately.
Focus: Make sure the important part of the image is sharp.
Perspective: Experiment with your position.
Editing: Make subtle adjustments after shooting.
Combine those elements and your iPhone can become a surprisingly capable photography tool.
Final Thoughts
Learning iPhone photography tips isn’t about memorising dozens of complicated camera settings.
It’s about understanding how to use the tools you already have.
Start by cleaning your lens and turning on the grid. Then experiment with exposure, natural light, different lenses and unusual angles. Once you’re comfortable, explore Portrait Mode, Night mode, Live Photos and editing tools.
Most importantly, don’t be afraid to take multiple photos.
Photography is a skill that improves through experimentation. The more you observe light, composition and perspective, the easier it becomes to recognise a great shot before you press the shutter.
Whether you’re photographing travel, food, people, pets, landscapes or everyday moments, these 15 tricks can help you capture better images with your iPhone in 2026.